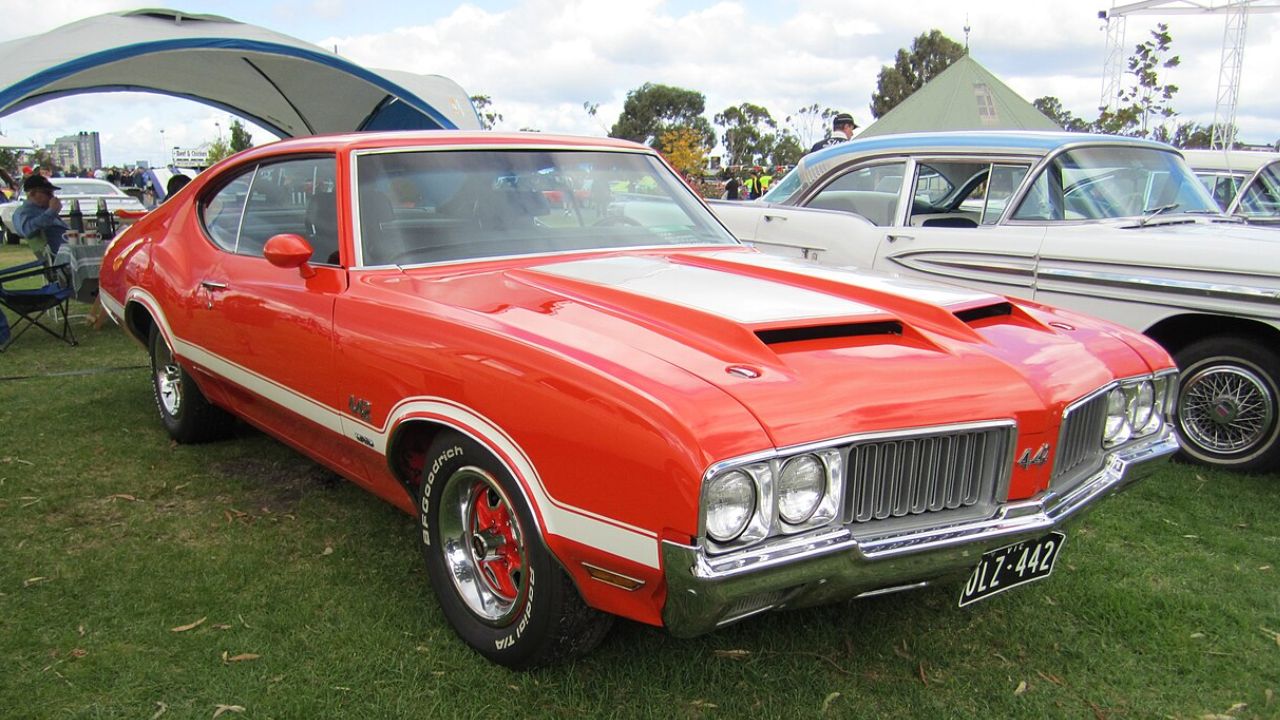
Restoring or maintaining a 1970 Oldsmobile 442 often starts with a simple plan: replace worn parts, freshen the look, and enjoy the car. Then reality shows up in the form of a bracket that doesn’t line up, a hose routed differently than the service manual illustration, or a “correct” reproduction piece that fits like it was meant for something else. For these cars, correctness isn’t just about judging sheets—it can determine whether the car runs right, stays cool, and feels like an Olds should.
Why “close enough” parts can cause real headaches
GM’s A-body platform was shared, but a 1970 442 isn’t a Chevelle in Oldsmobile clothing, and parts interchange isn’t always as simple as it looks. Mounting points, linkage geometry, and accessory spacing can differ by division and engine family, so using a near-match part can create small misalignments that turn into persistent problems. That’s especially true around the front accessory drive, cooling system, and exhaust, where a quarter-inch error becomes a belt that won’t track or a pipe that rattles on the frame.
There’s also the issue of mid-year running changes and dealer service replacements. The 1970 model year was a busy time across GM, and owners today are often working with cars that have had decades of “whatever worked” repairs. It’s not that any one substitute part is automatically wrong—sometimes it’s the combination that causes the trouble, like mismatched pulleys and brackets that were never designed to live together.
Understanding what made the 1970 442 unique
The 1970 442 is closely associated with Oldsmobile’s 455-powered performance image, but the car is more than an engine choice. Oldsmobile used its own engine architecture, accessory brackets, and many division-specific details that differ from Chevrolet-leaning aftermarket assumptions. That matters because a lot of reproduction parts catalogs are written broadly for “A-body” applications, and small print is where owners find out whether a part truly fits a 442 with Olds power.
Options also complicate the “correct parts” question in a historically plausible way. Air conditioning, power steering, different axle ratios, and even factory-style ignition shielding and line routing can change which brackets, pulleys, and lines are appropriate. Two 1970 442s can look similar in photos but require different pieces under the hood, which is why verifying by application and component numbers is worth the effort.
Common trouble spots: brackets, pulleys, and cooling pieces
If there’s one area where owners learn the lesson fast, it’s the front of the engine. Accessory brackets and pulleys need to match each other so belts run in the same plane; mixing parts from different years or from other Olds models can lead to squeal, thrown belts, and premature bearing wear. Even when everything “bolts up,” improper spacing can cause the alternator or power steering pulley to sit slightly off, which you might only notice after a few frustrating test drives.
Cooling is another place where correct parts matter in a practical way. Radiator hose shapes, heater hose routing, fan shrouds, and thermostats aren’t glamorous, but the right combination helps the car behave in traffic the way it should. Owners who chase overheating sometimes find the root cause isn’t the radiator itself—it’s a fan clutch that isn’t correct for the application, a missing or incorrect shroud, or a cap that doesn’t match the system’s intended pressure rating.
Ignition, fuel, and drivability: when mismatched parts feel “almost right”
Many 442s have lived through eras of parts swaps: universal plug wires, generic distributors, aftermarket coils, and carburetor substitutions. The car may run, but it might not run like a well-sorted Oldsmobile—hot starts can be cranky, idle quality can wander, and part-throttle response can feel flat. Using components that match the engine’s intended calibration and hardware layout can make tuning straightforward again, rather than a constant fight with timing curves or vacuum signals that don’t agree.
Fuel delivery is similar. A “works for most GM” fuel pump or filter might physically fit, yet routing and clearances can become questionable, especially with factory-style lines and brackets. When owners take the time to match the correct-style pieces—right bends, right mounting points, right fittings—the engine bay becomes easier to service and less prone to rubbing, leaks, or vapor-related quirks during heat soak.
Reproduction vs. original: choosing the right kind of “correct”
Not all reproduction parts are created equal, and owners learn to differentiate between cosmetic correctness and functional correctness. A reproduction trim part might look perfect at ten feet but have mounting studs placed slightly wrong, making alignment difficult and stressing the panel. Under the hood, a reproduction bracket or pulley that’s dimensionally off can be more than an annoyance—it can affect belt alignment and accessory life.
That doesn’t mean original parts are always the answer, either. Some original components are worn, fatigued, or simply hard to find in safe condition, and a high-quality reproduction can be the best choice. The key is verifying the supplier’s reputation, checking measurements when possible, and comparing against known-good originals or credible reference photos rather than relying on a vague catalog description.
Practical ways owners verify parts before money is spent
The most effective approach is to document what’s on the car before ordering anything, because many 442s have been modified over the decades. Casting numbers, date codes, and part numbers—where accessible—help identify whether you’re dealing with original-style components or a mix from other applications. Service manuals and factory assembly manuals (when available) can be especially helpful for routing, fastener types, and bracket stacks that aren’t obvious from memory.
Owners also tend to lean on community knowledge, and for good reason: long-running Oldsmobile clubs and model-specific forums have deep archives of photos and real-world fitment notes. Bringing your existing part to compare at a swap meet or to a trusted restoration shop can prevent buying a “looks right” piece that turns into a return. And when you do replace something, changing one system at a time—rather than rewriting the whole engine bay at once—makes it easier to spot which part introduced a new issue.
What surprises many 1970 442 owners isn’t that some parts are rare—it’s how much the car rewards accuracy. When the brackets align, the cooling system is complete, and the ignition and fuel pieces suit the engine, the car tends to start easier, idle cleaner, and drive more like the refined muscle car Oldsmobile intended. Getting there usually takes patience and verification, but it’s the kind of effort that pays off every time you turn the key.